Since July 15, 2013, the wireless network ntu_peap has used the same password as NTU e-mail accounts. If you already set up ntu_peap prior to this date, please delete your old network settings and complete setup again using your NTU e-mail password. (Note: do not include @ntu.edu.tw in the account name.) To find instructions on how to delete your original network settings, go here: http://ccnet.ntu.edu.tw/english/wireless/clear_peap.html
Windows 8
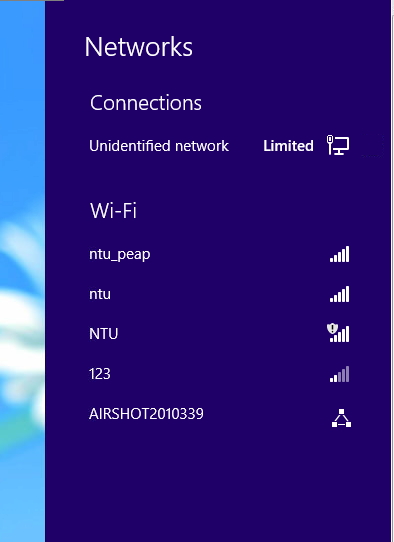
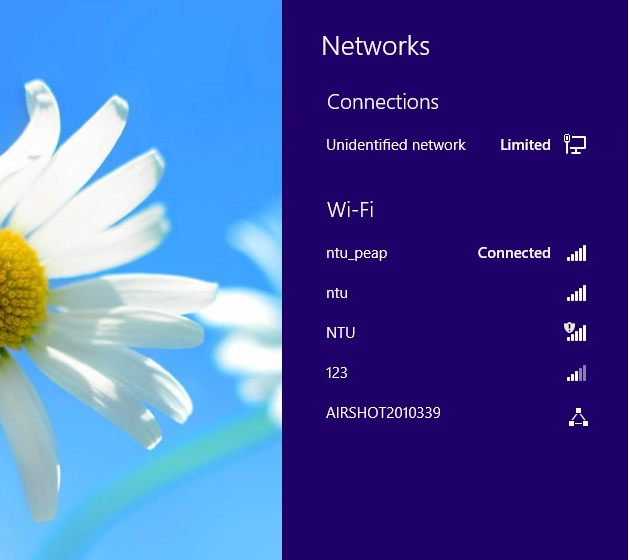
Open the side panel, select "Networks".
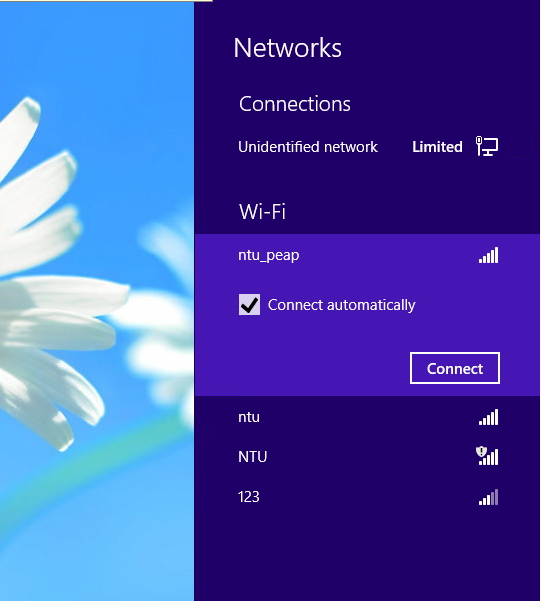
Click "ntu_peap" and select "Connect automatically".
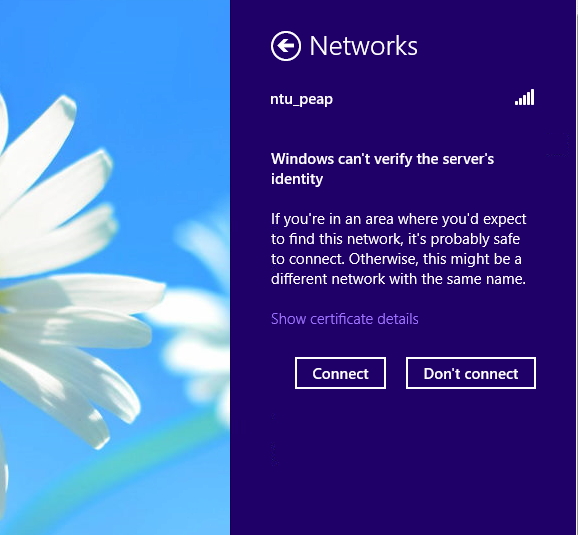
Click "Connect" button.
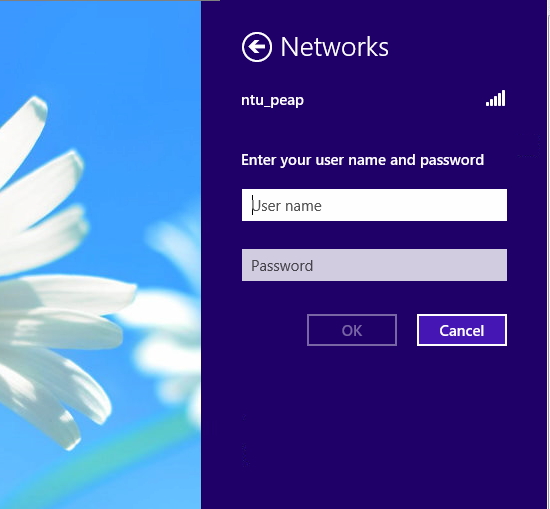
In the window, enter your "NTU C&INC" account name and password.
Then click "OK".
Ignore the alert message.
ntu_peap has been successfully set up.
Windows 7
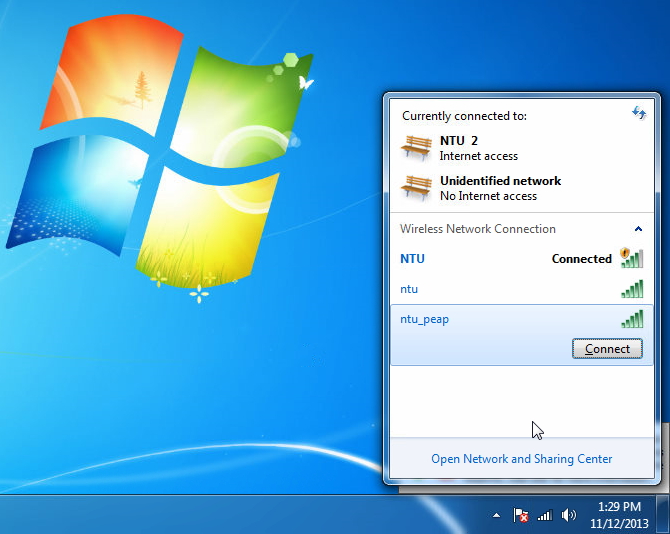
On the right side of the Desktop Taskbar, click and open the network settings.
Select "ntu_peap" and click "Connect".
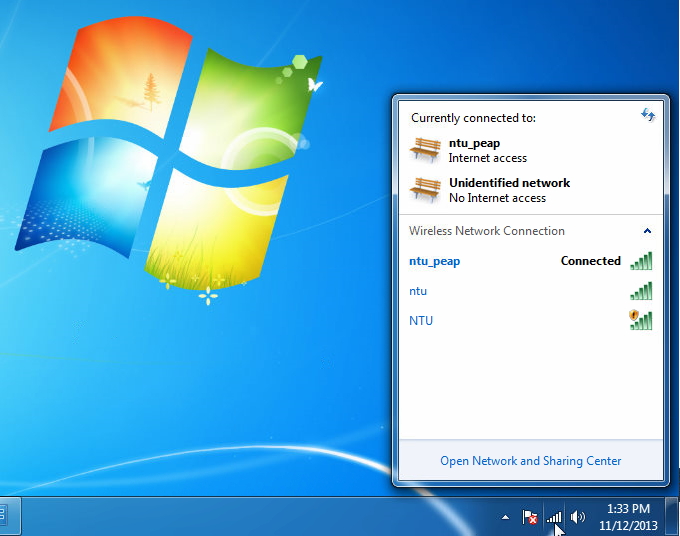
In the window, enter your "NTU C&INC" account name and password.
Then click "OK".

Ignore the alert message.

ntu_peap has been successfully set up.
Windows XP
Start > Control Panel > Network and Internet > Wireless Network Connection
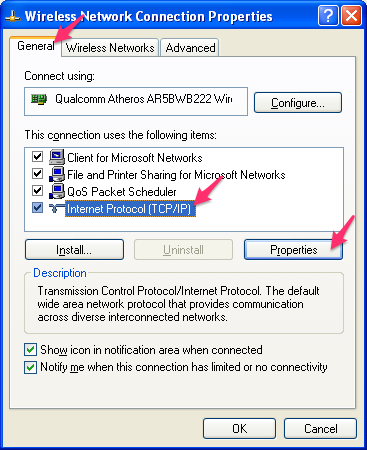
On "Wireless Network Connection", right-click and select "Properties".
Under "General", check "Internet Protocol (TCP/IP)", then select "Properties"
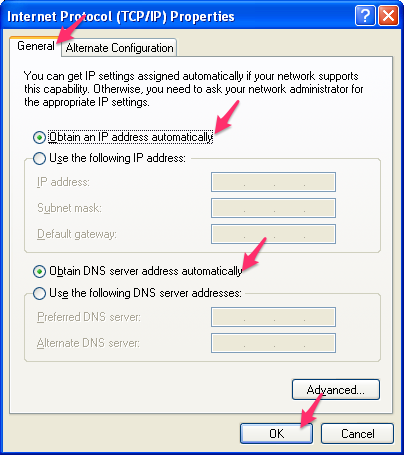
In the "Internet Protocol (TCP/IP) window, select "General", then select "Obtain and IP Address Automatically" and "Obtain DNS Server Address Automatically", then click "OK"
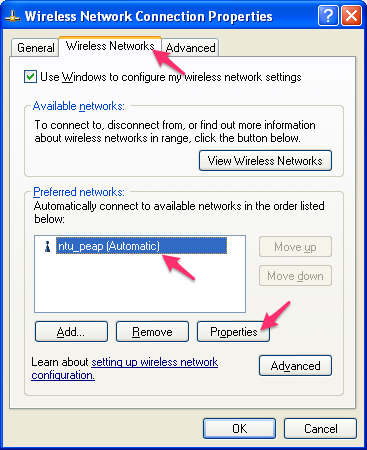
In the "Wireless Internet" section of the "Wireless Properties page, select "ntu_peap", then selec "Properties".
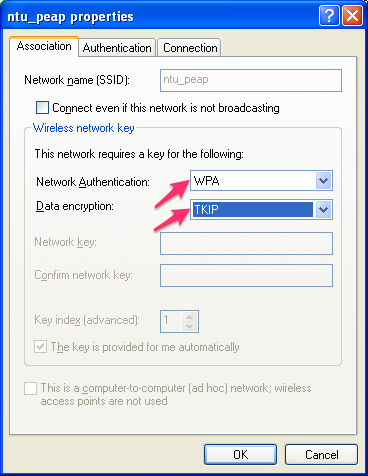
In the "Network Authentication" section, select "WPA", for "Data Encryption", select "TKIP".
Please note: If your network equipment does not support WPA2-Enterprise, please instead select: WPA-Enterprise for the "Security Type", and for the "Encryption Type": AES. However, please use WPA-2 if it is supported.
For "Security Type": WPA2, "Encryption Type": AES
Under "ntu_peap Properties", under "EAP", select "Protected EAP(PEAP)", then select "Properties".
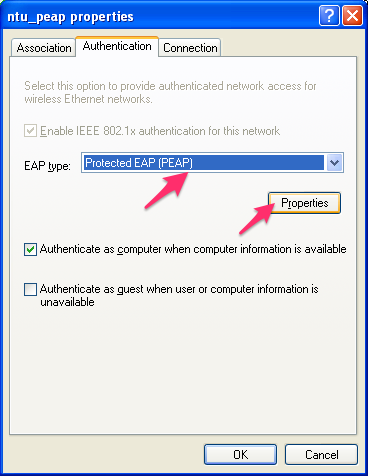
You do not need to select "Validate Server Certificate", below select "Secured Password (EAP-MSCHAP v2), then click "OK".
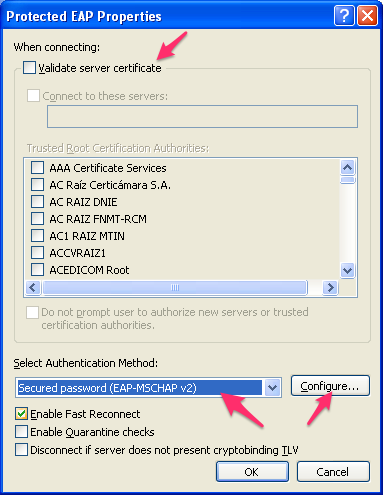
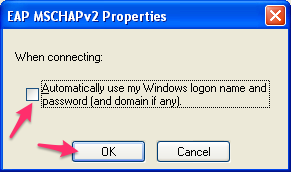
Click "Set" in the bottom right, then "OK". (You cannot check "Automatically Use Windows Logon Name and Password")
After clicking "OK", you will see the connection status in the lower right corner of the screen.
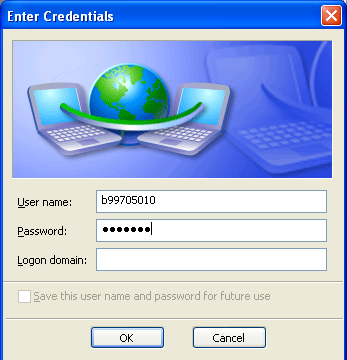
If you click the connectivity icon, the following pop-up will appear:
Enter your C&INC user name and password, then click "OK".

ntu_peap has been successfully set up.

Mac OS X 10.7
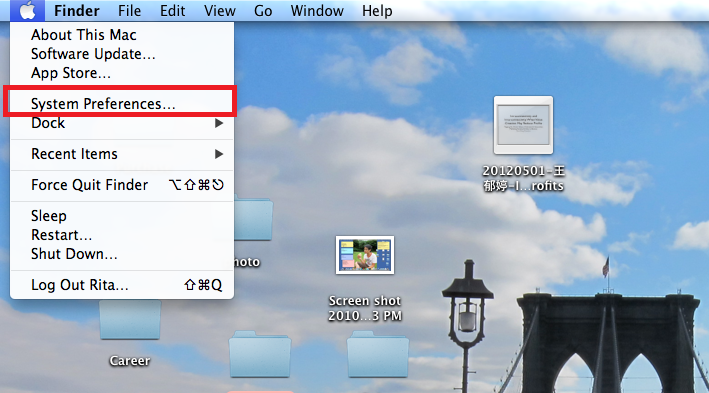
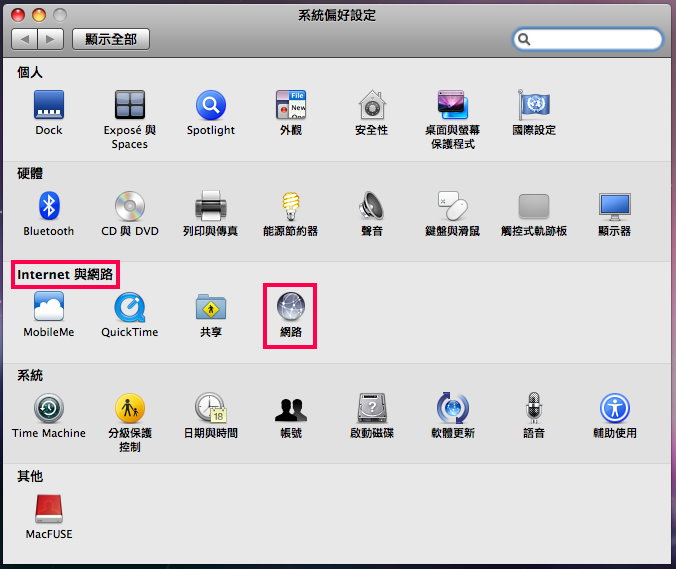
On the Desktop, select "System Preferences"
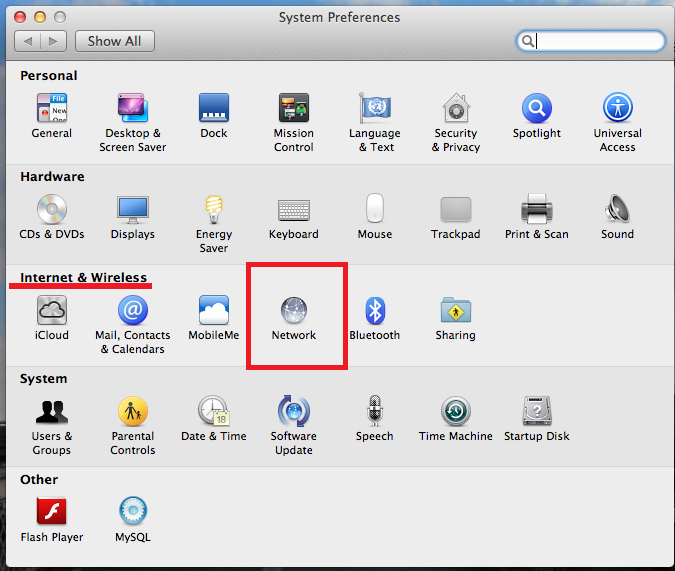
In the "System Preferences" window, under "Internet and Wireless", select "Network".
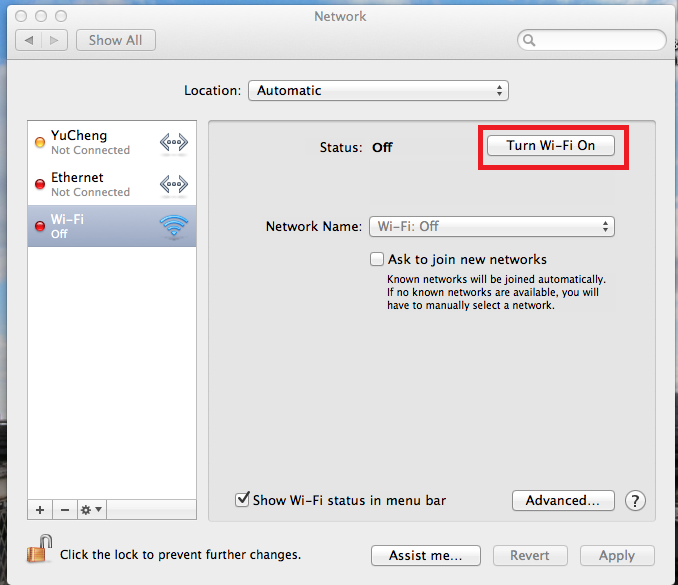
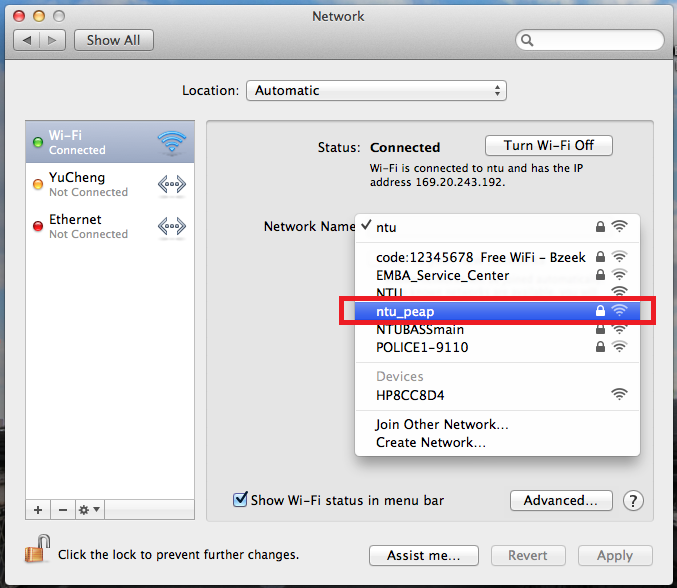
In the "Network" window, select "Wi-Fi", then "Turn Wi-Fi On".
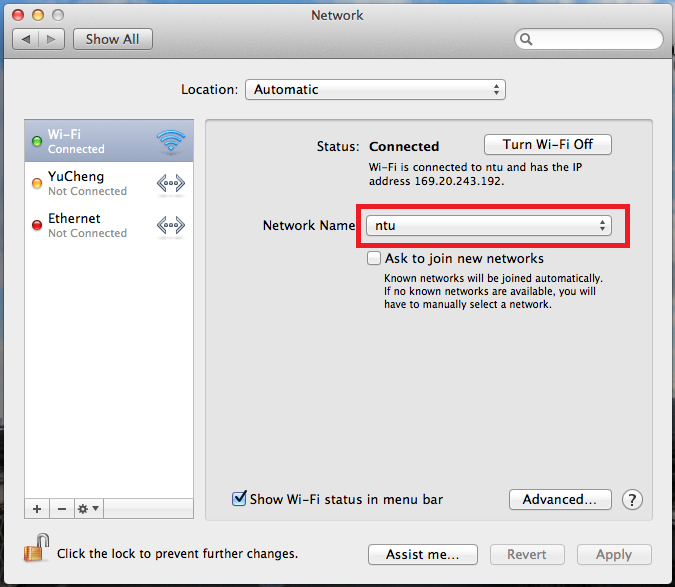
In the "Network Name" sections, select "ntu_peap".
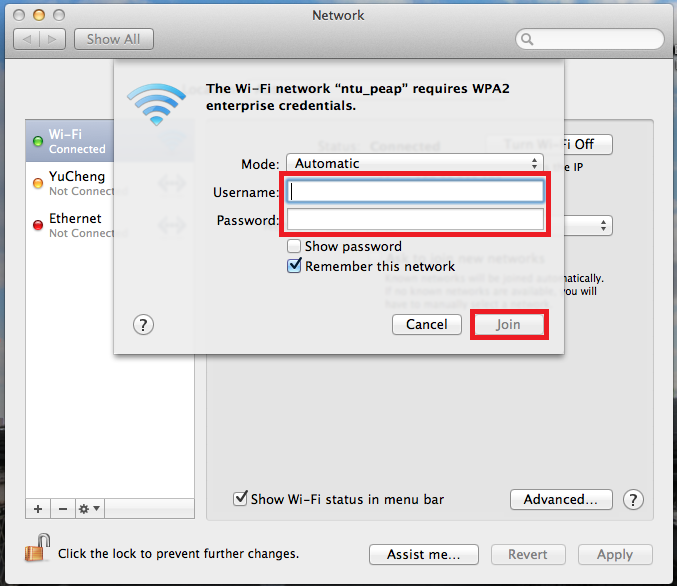
For "Username" and "Password", use your NTU VoIP user name and password, (not your C&INC password), then click "Join".
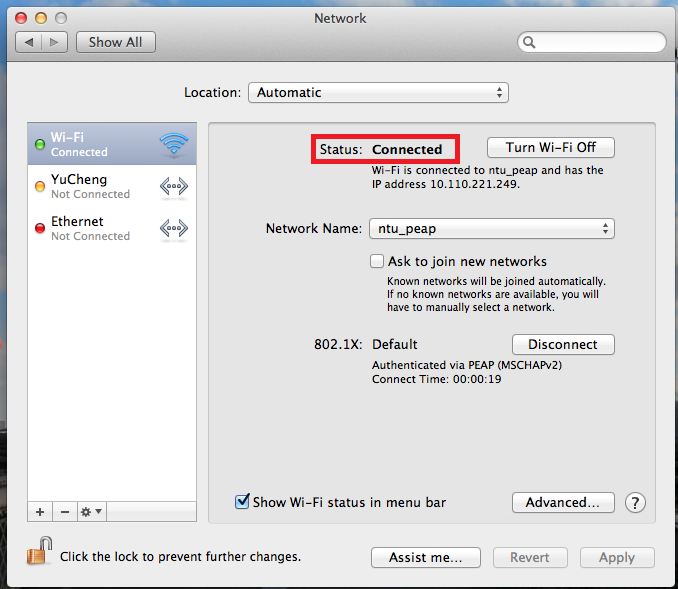
Return to the "Network" window to check the connection status. If the status reads "Connected" to ntu_peap, click "Apply".
Mac OS X 10.6
On the Desktop, select "System Preferences".

Under System Preferences > Internet and Wireless, select "Network".
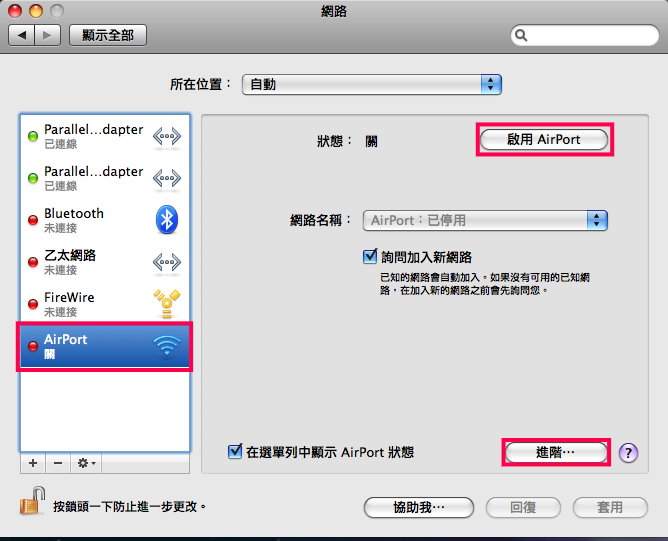
In the "Network" window, select "Airport", then "Enable Airport", then click "Advanced".
In the "Airport" window, select "802.1x".
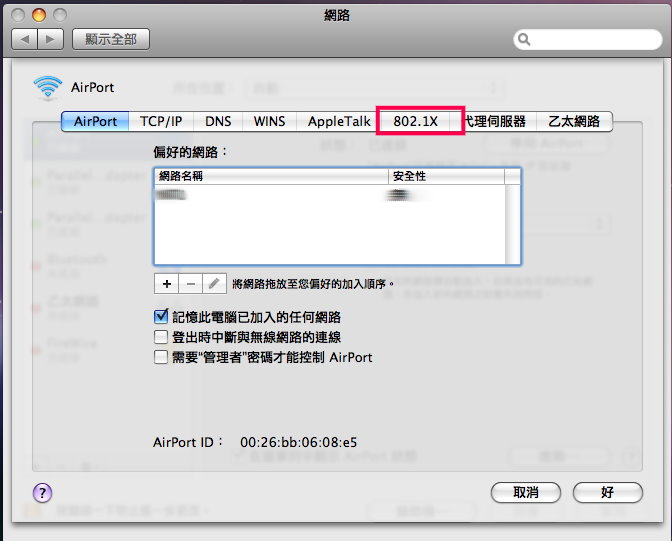
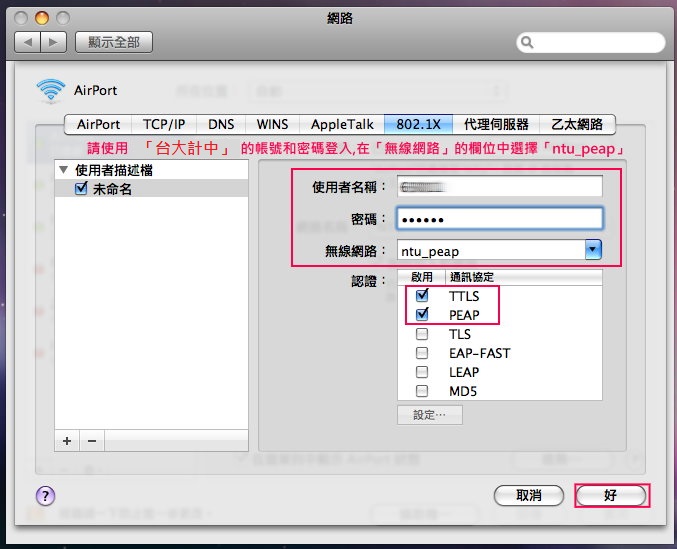
Enter "802.1x"
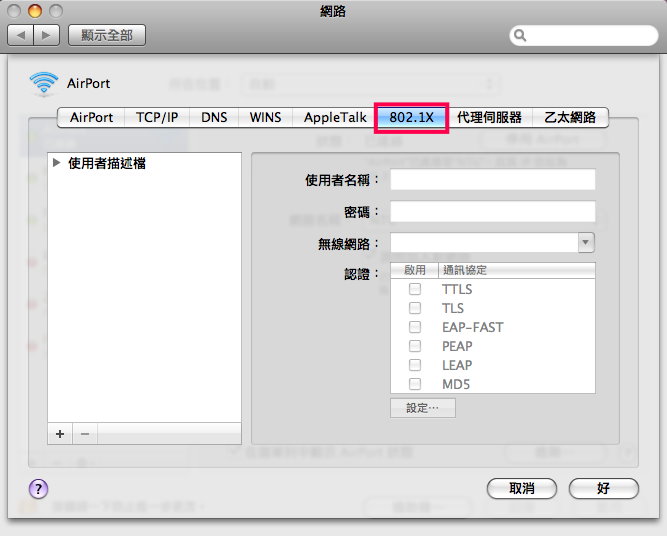
On the left, click "User Profie".
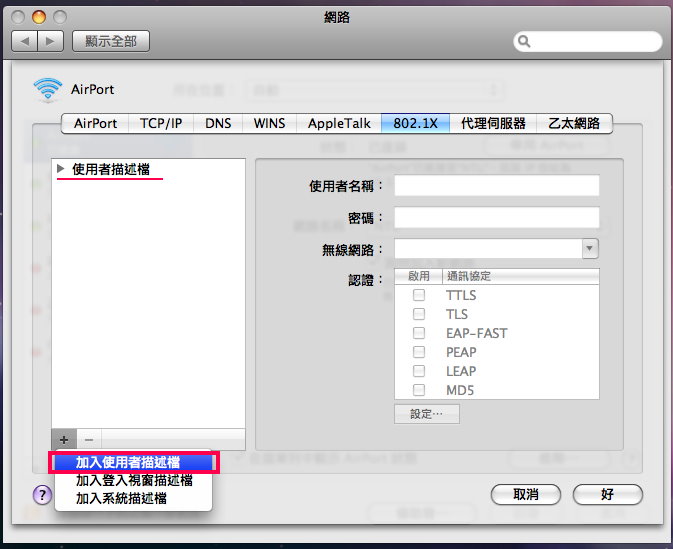
Under "User Name" and "Password", enter your NTU VoIP user name and password (not your C&INC user name and password). In the "Wireless Network" field, select "ntu_peap", under "Authenticate" select "TTLS" and "PEAP", then click "OK".
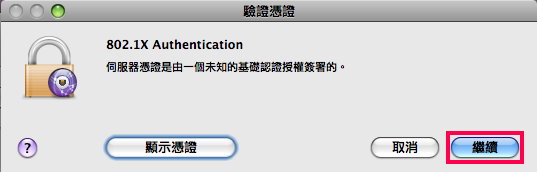
When asked for "Authentication Credentials", select "Continue".
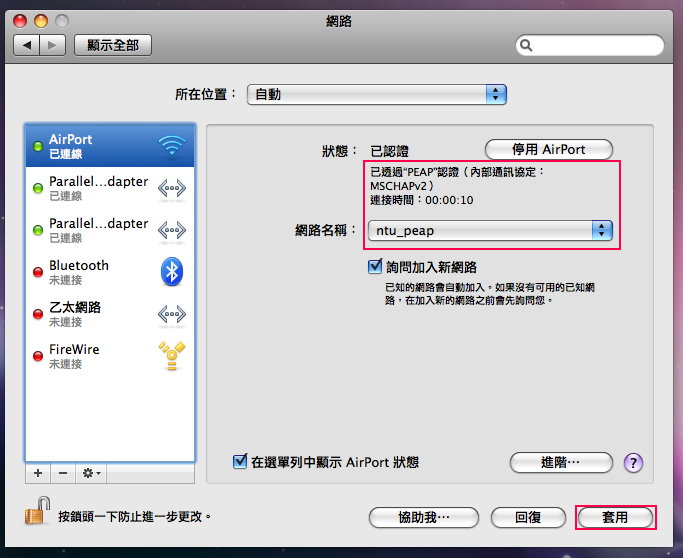
Return to the "Network" window, under "Airport Status", it should display "Connected". For "Network Name", use "ntu_peap", then click "Apply". The internet setup is now complete.
Android 4.0
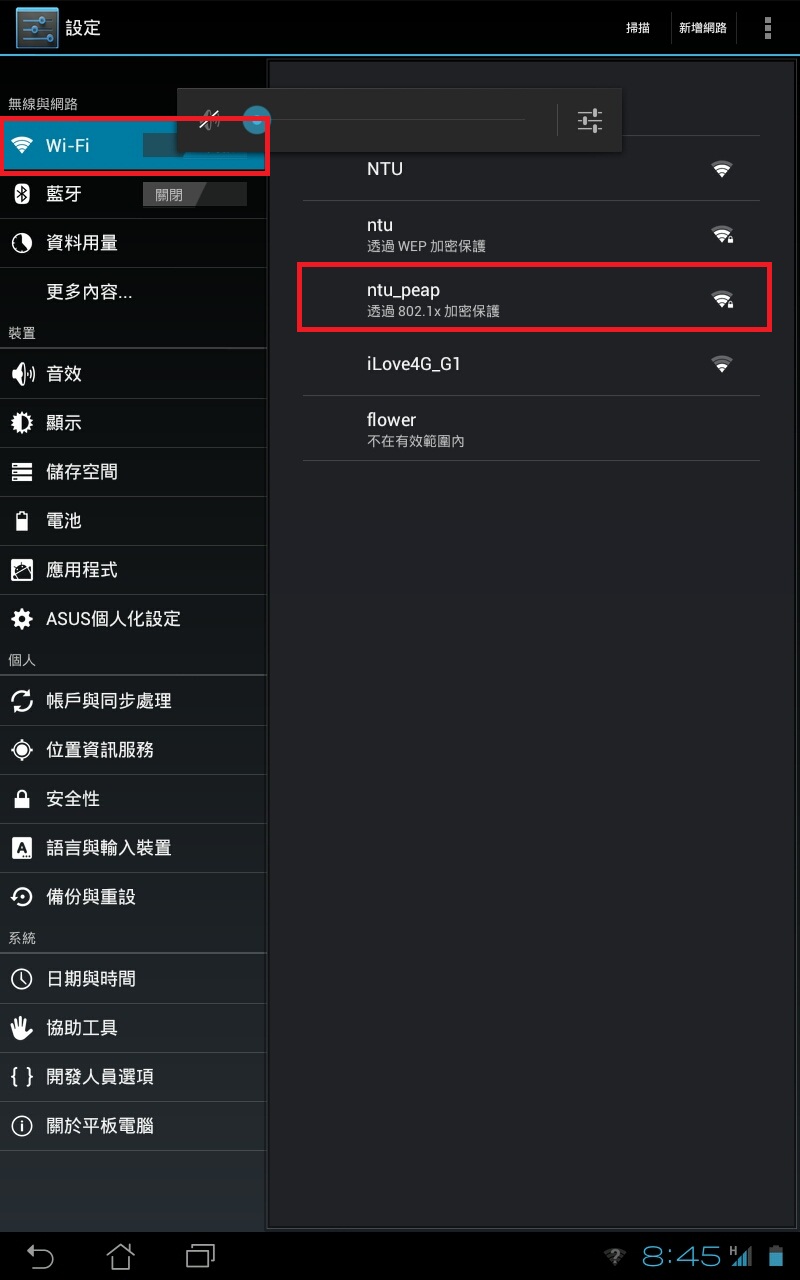
To set up an Android Device’s Wi-Fi, select "Menu" on the home page, then select "Settings". Tap "Wireless Controls", then tap "Wi-Fi". Once the "Wi-Fi icon is green, tap "Wi-Fi Settings". Under "Wi-Fi Networks", select "ntu_peap".
For the "Identity" and "Anonymous Identity" fields and the corresponding password, use your NTU VoIP user name and password (not your C&INC information).
In the "CA Certificate" and "User Certificate" fields, select "Not Specified" for both, then select "Connect".

iOS
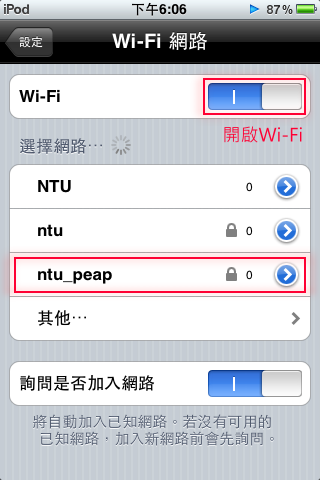
To setup Wi-Fi on an iPhone, first select "Settings" on the home page.

Tap "Wi-Fi", make sure Wi-Fi is switched to "On", then select the network "ntu_peap".
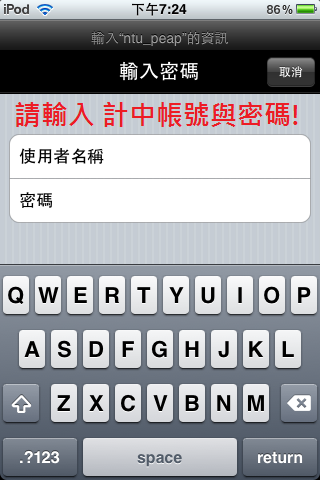
For the user name and password, use your NTU VoIP account information (Not your C&INC information), then tap "Join".
On the "Certificate" page, tap "Accept".
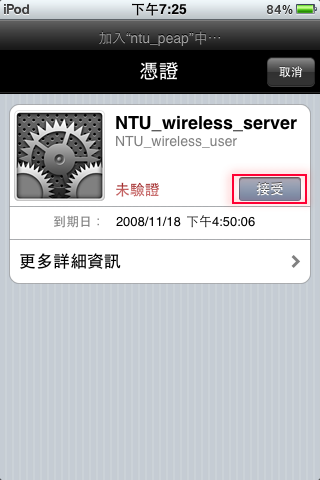
ntu_peap setup is complete.

Windows Phone 8
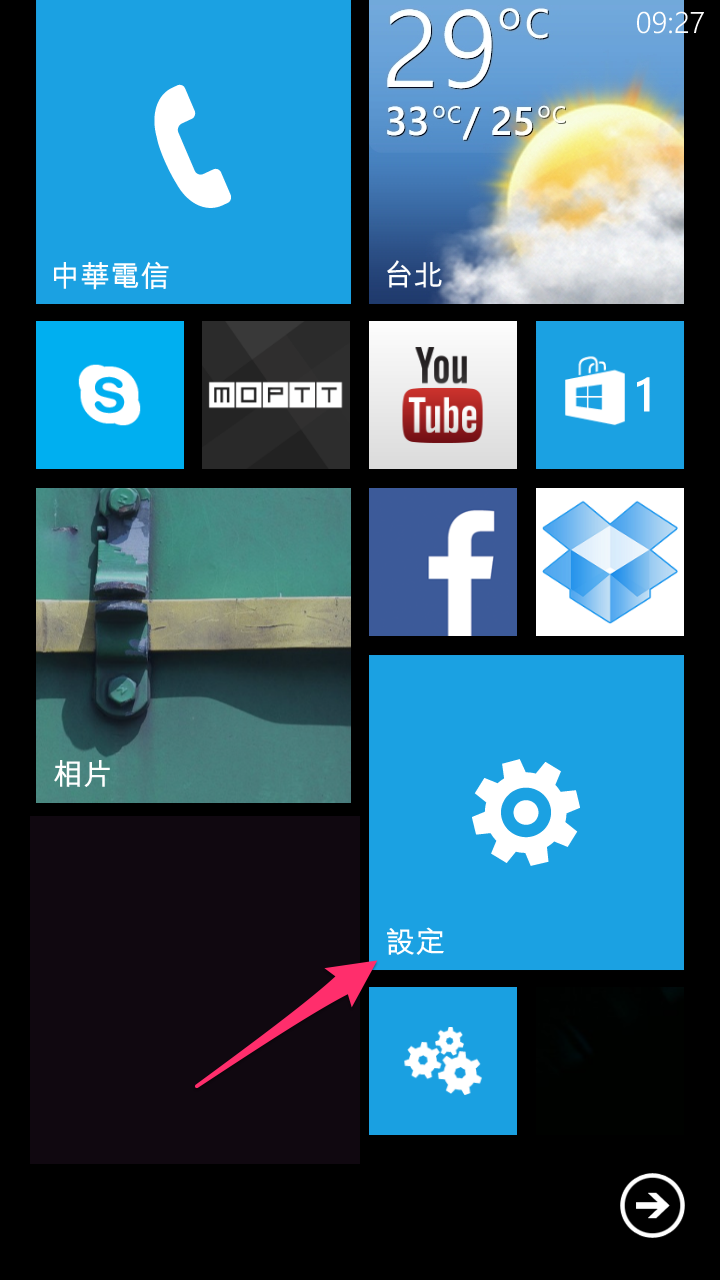
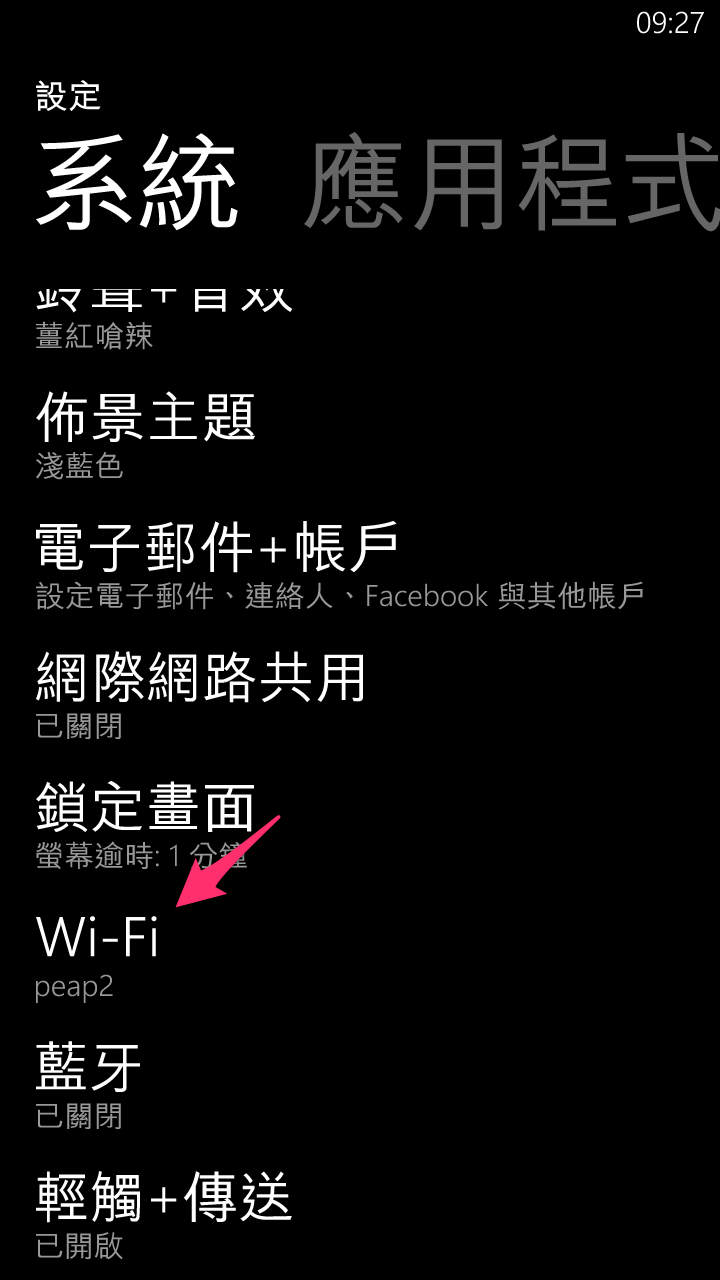
On the App list, select "Settings".
Select "Wi-Fi".
Select the network "ntu_peap".
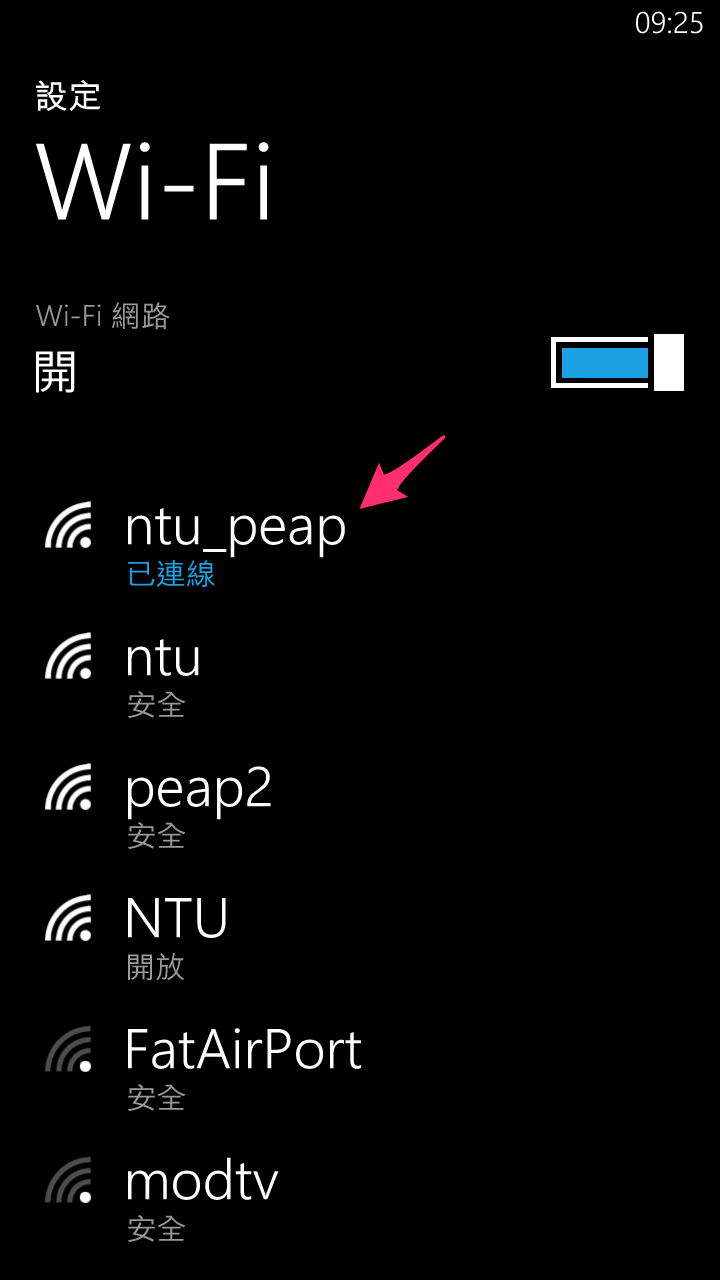
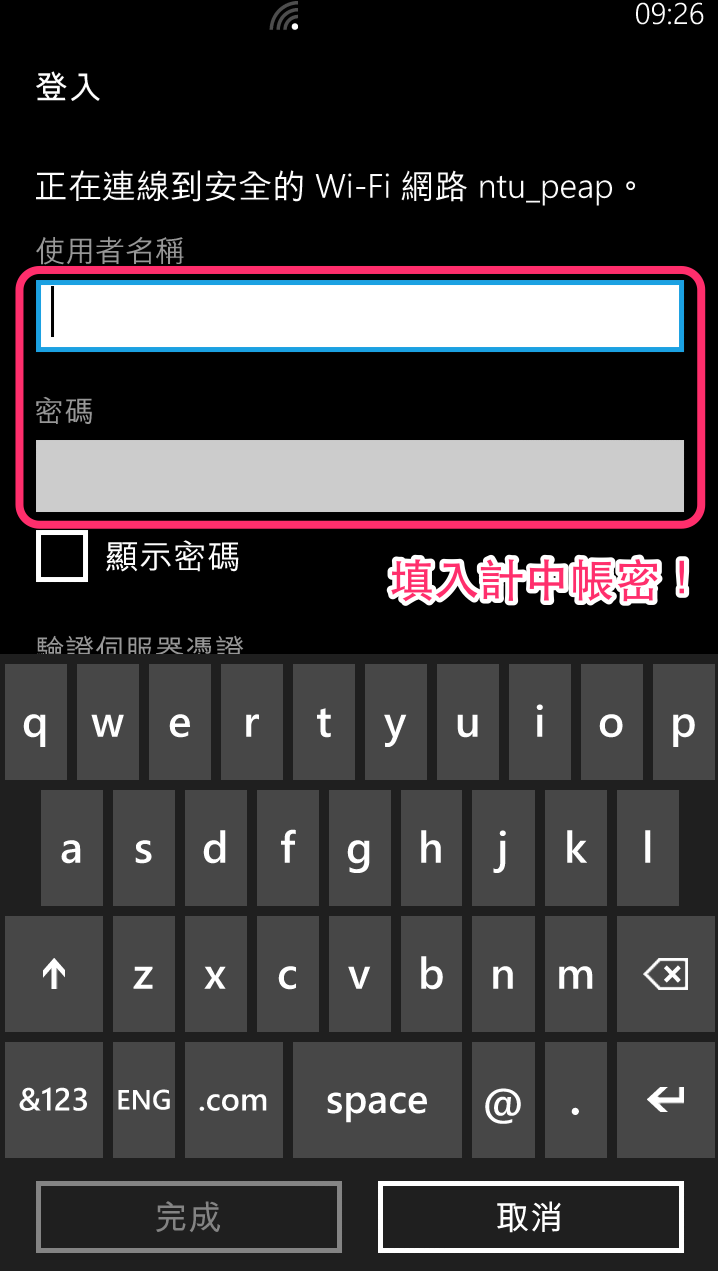
Enter your user name and password.
After selecting "Done", the ntu_peap network will be ready to use.