Windows 7
On the right side of the Desktop, right click and select "Open Network and Sharing Center".
In the "Network and Sharing Center" window, under the "Network Settings Change" tab, select, "Connect to a Network".

After selecting "Connect to a Network", select "ntu".
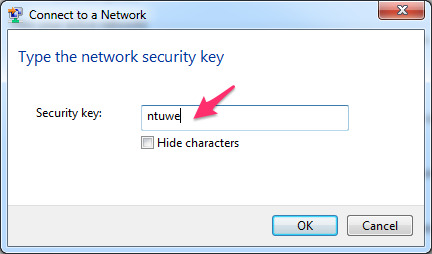
In the "Network and Sharing Center" window, it will ask for a network security key. Enter "ntuwe" and click "OK".
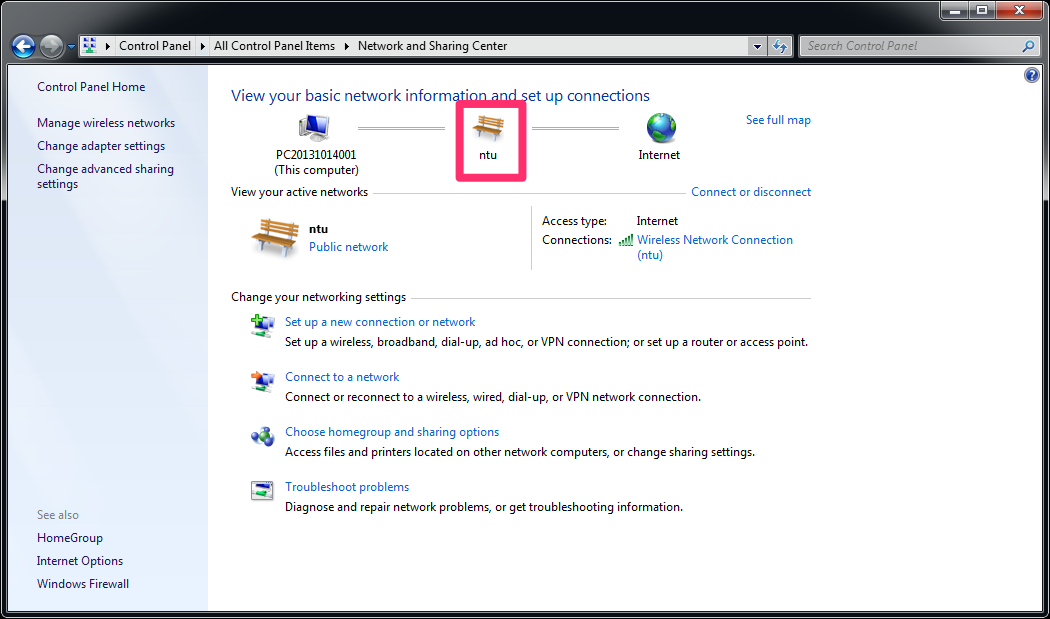
Return to the "Network and Sharing Center" window, where you will see if you are successfully connected to the "ntu" network under "View Your Basic Network Settings".
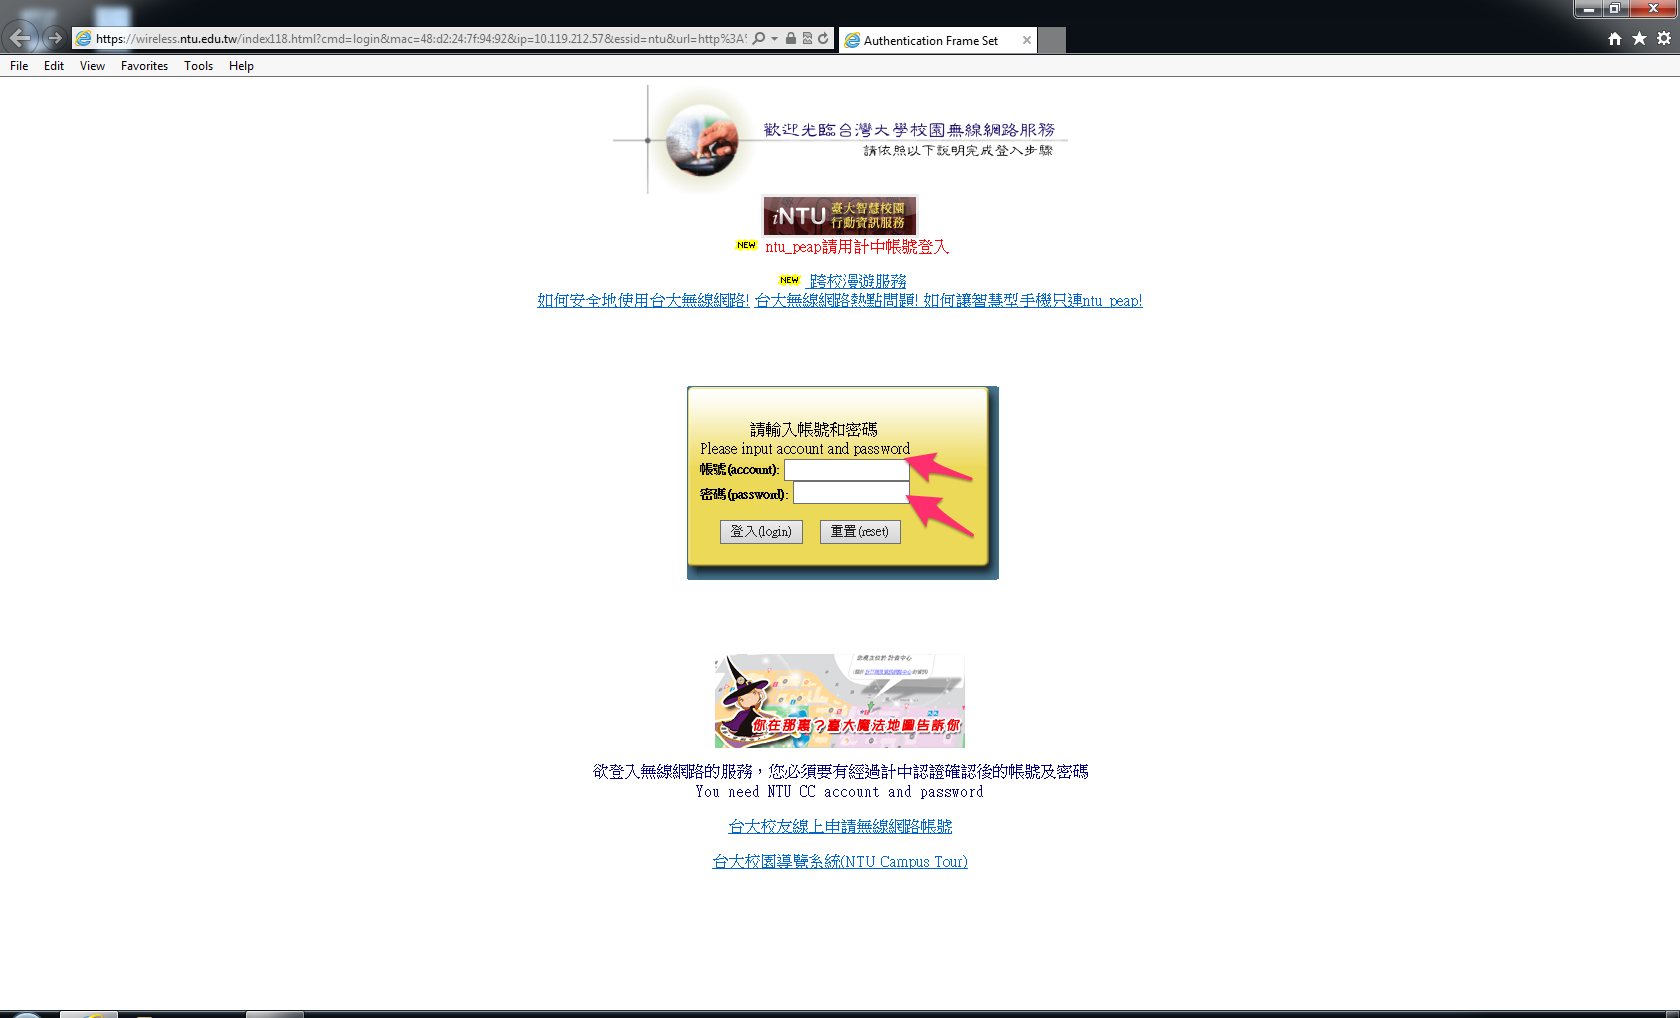
When you open Internet Explorer, the browser will automatically redirect to the NTU internet account log-in page. In the user name and password fields, use your C&INC e-mail and password to log in.
Windows Vista
Once you have found a list of the wireless networks available, to connect to the NTU wireless network, select the "ntu" network, enter the network key "ntuwe", if a hexidecimal is required, enter "6e 74 75 77 65".
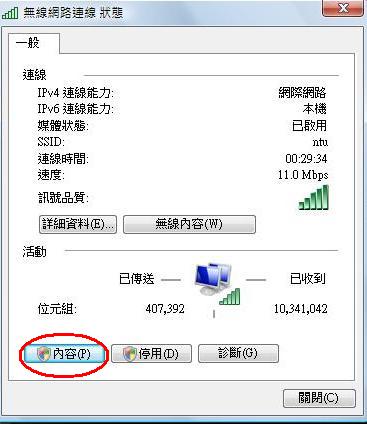
Open the Control Panel > Network and Internet > Network and Sharing Center, then select "View Status".
In the " Wireless Network Connection" window, select "Properties".
Under "Properties", select "Internet Protocol Version 4 (TCP/IPv4)", then select "Properties".
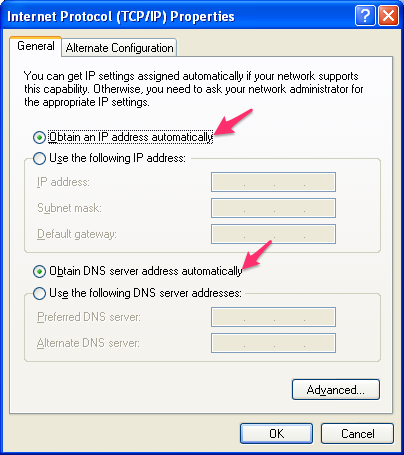
In the "Properties" section of "Internet Protocol Version 4 (TCP/IPv4)", select "Obtain an IP Address Automatically", and "Obtain DNS Server Address Automatically".
Windows XP
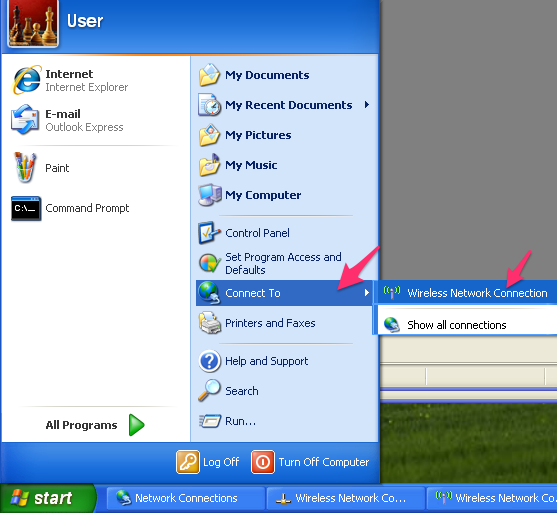
Start Menu > Control Panel > Network Connections > Wireless Network Connection
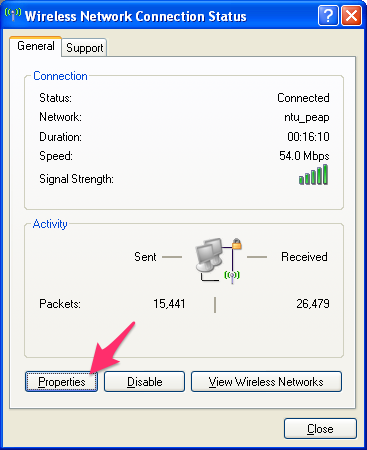
In the "Wireless Network Connection" window, under "General", select "Properties".
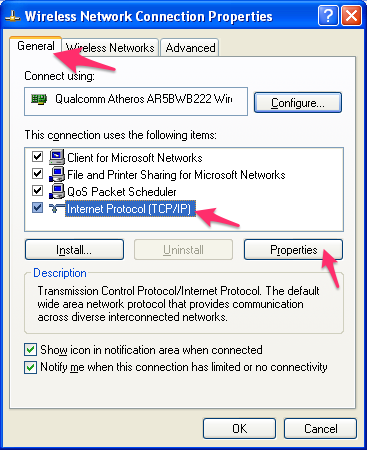
In the "Properties" window, under "General", select "Internet Protocol (TCP/IP)", then select "Properties".
"Internet Protocol (TCP/IP) Properties" window:
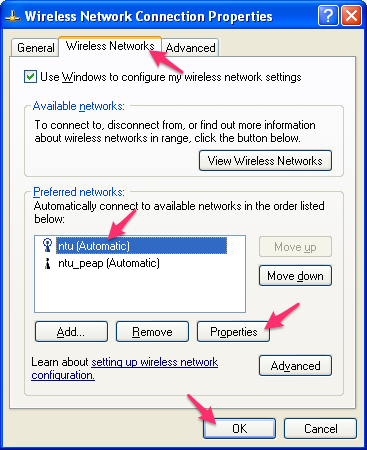
In the "Wireless Network Connection Properties" window, under "Wireless Network", go to "Available Network List"
- Click "Refresh"
- Locate "ntu"
- Click "Settings"
- Go to the "Settings" window
- Click "OK"
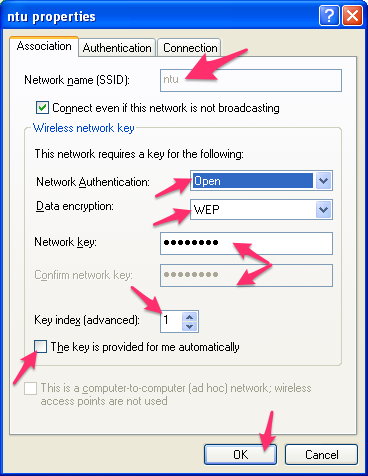
"Settings" window:
- In the "Network Name (SSID)" field, enter: ntu
- In the "Network Authentication" field, select "Open System"
- In the "Data Encryption" field, select: WEP
- Uncheck the box "Provide Network Key Automatically" (Please note some internet cards are automatically set to O)
- In the "Network Key" field, enter: ntuwe. If a hexidecimal is required, enter "6e 74 75 77 65"
- In the "Confirm Network Key" field, again enter: ntuwe, and 6e 74 75 77 65 if required
- Click "OK"
- Return to the "Wireless Internet Connection Properties" page
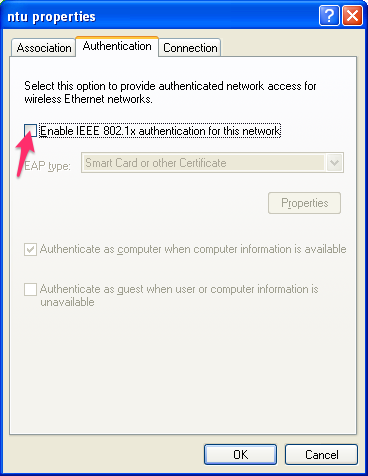
Select "Verification".
Please do not select "Start IEEE 802.1x Authentication for this Network".
Open Internet Explorer, which will automatically redirect to https://wireless.ntu.edu.tw/ (The redirection depends on each user's individual settings).
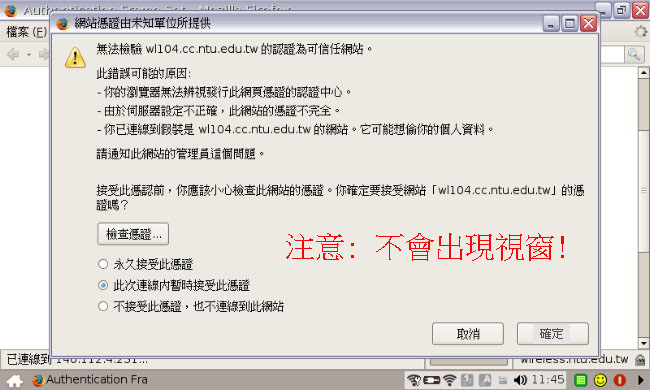
Please note: The following window will not display a "Security Warning"
In the user name and password fields, please use your C&INC e-mail and password to log in.
Please note: After entering your user name and password, there will be no security certificate error!
Windows 2000
Internet Setup
After the correct drivers have been installed and the computer has been rebooted, select the "Profile" window, then select "Default", then click "OK".

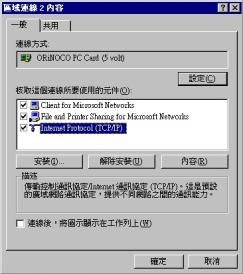
In the "Network and Dial-up Connections" window, (Start > Settings > Network and Dial-up Connections), select "ORiNOCO PC Card (5 volt)" as the Local Area Connection, then select "Properties".

Under "General", select "Internet Protocol (TCP/IP)" and then "Properties".
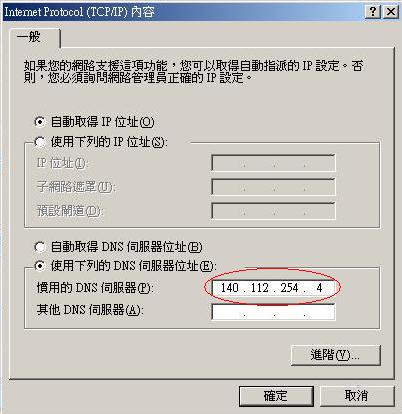
In the "Internet Protocol (TCP/IP) Properties" window, please select the school-provided DHCP service, then select "Obtain an IP Address Automatically" and use the following DNS server address: 140.112.254.4
Network Configuration Setup
On the bottom right side of the Desktop, locate the  icon, right click, and select "Launch Client Manager".
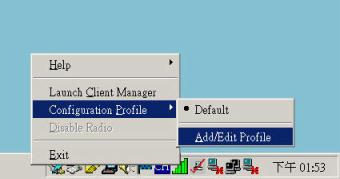
After clicking "Add/Edit Configuration Profile", on the right, click "Access Point". Then click "Edit Profile" on the bottom right.
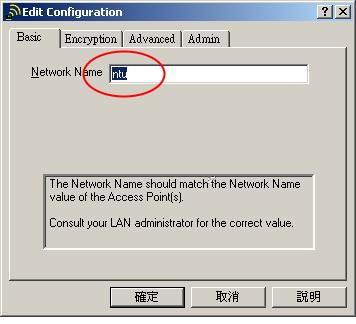
On the "Basic" page, enter the name of the network. NTU currently uses the network "ntu". You can also fill in the network name as "any", which tells the computer to search out the network with the strongest signal at any given time.
On the "Encryption" page, select "Enable Data Security" to allow for the transmission of encrypted files. In the "Key" drop-down menu on the right, you can select which key will be used to transmit information.
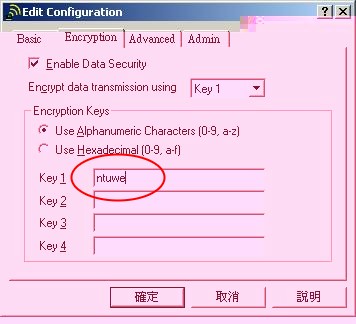
If you would like to use the school’s key, enter "ntuwe" into "key1".
If a hexidecimal is required, enter "6e 74 75 77 65".
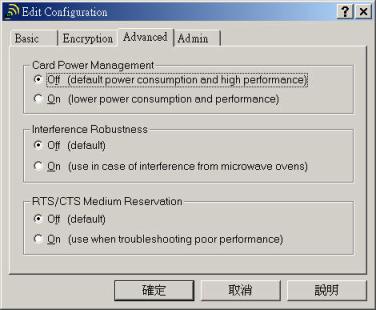
On the "Advanced" page:
- The first thing you will see is the "Card Power Management" page. The default is set to "Off". A switch to "On", will result in saving power but reduced performance.
- The second item is "Interface Robustness", which defaults to "Off". If you use wireless internet in the vicinity of a microwave or a 2GHz electromagnetic wave transmitter, you can switch this option to "On" for enhanced performance.
- he third item is the Access Point. If this switch is set to "Off", the wireless network interface will wait to send data until the Access Point is not being used. If there are two stations trying to use the Access Point at the same time, it will result in a jam, and neither station will be able to send data. If you switch this options to "On", it will enable the computer to be able to send an RTS (Request to Send) or a CTS (Clear to Send) communication, so long as the data message does not exceed the upper size limit. If this limit is exceeded, an RTS message will be sent to the Access Point for delayed processing. The Access Point will send CTS messages to other stations, using them to forward the RTS. Typically the internet connection can continue operating normally during this process.
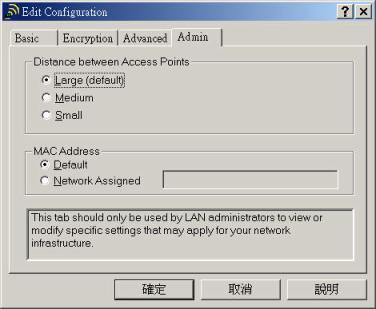
On the "Admin" page, please leave everything set to default. If you need to change the settings please contact your network administrator.
Client Manager Setup
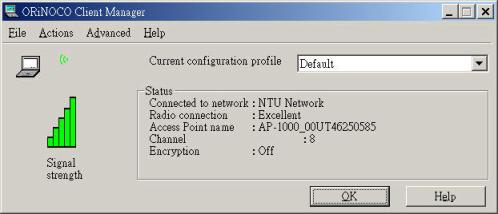
On the bottom right side of the Desktop, locate the "XXXXX", icon, right click, and select "Launch Client Manager".

This will open the "ORiNOCO Client Manager" window, on the left side is the signal strength. If the signal strength shows only green, it means there is good reception. Yellow means average reception, and if the signal is white, it indicates poor reception. In the bottom right corner is the connection status. If you are connected to the internet, this will read "Connected to Network", the signal strength will read "Radio Connection", the wireless connection will list which channel it is using and the network encryption status.
Pocket PC
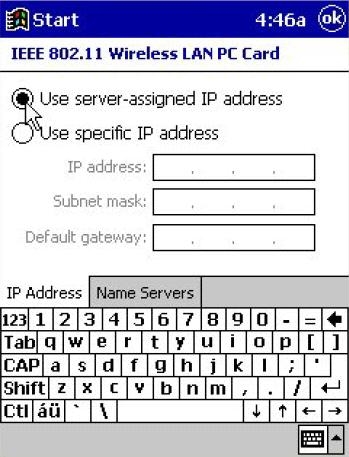
The Network Card settings should be set to "Use Server-assigned IP Address".
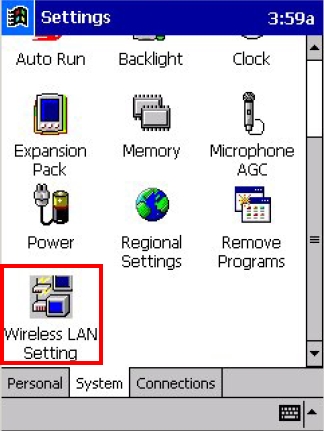
Open (Start > Settings) > Select "System" > Select "Wireless LAN Settings".
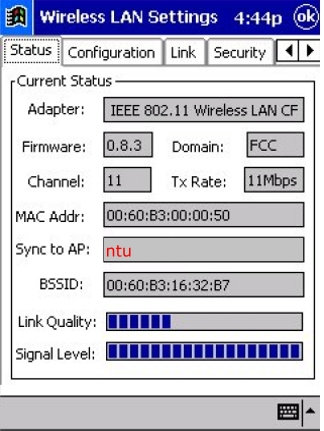
On the "Status" page,
the wireless connection status for your PDA will be displayed. Please confirm that you are connected to the "ntu" network. If your device cannot locate the "ntu" network, please see step 4 (the next step).
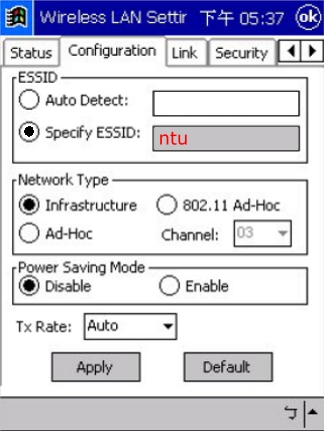
On the "Configuration" page,
for the ESSID option, please select "Specify ESSID", fill in "ntu", then click "Apply". Return to the previous step and check if the device is now able to locate the "ntu" network.
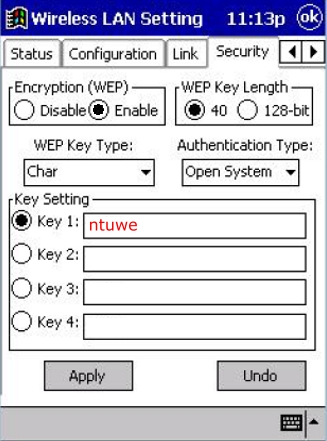
On the "Security" page,
Under "Encryption (WEP)" select "Enable". Under "WEP Key Type", select "Char". Under "Key Setting", select "Key 1" and enter "ntuwe". If a hexidecimal is required, enter "6e 74 75 77 65".
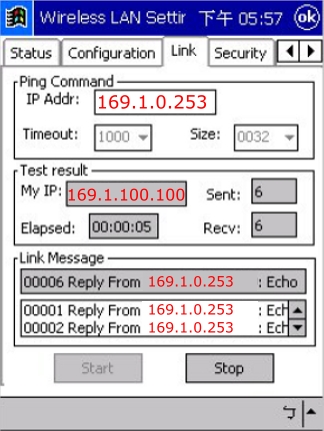
On the "Link" page,
enter 169.1.0.253 in the "IP Addr" field. The "MyIP" field should automatically display 169.1.100.100. Click "Start", then check whether the internet is working normally.
Mac OS X
Internet Settings: Select the "ntu" wireless network.
Password: "ntuwe" > check the "Add Key" box, select "Join". If a hexidecimal is required, enter "6e 74 75 77 65".

Please note: After entering your user name and password, there will be no security certificate error!
After finishing with the certification page, use your C&INC e-mail account and password to log in.
Mac OS X 10.6
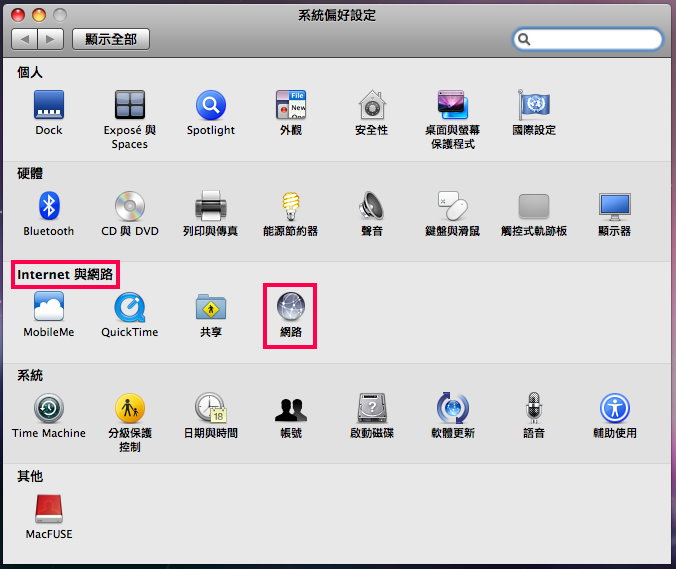
On the Desktop, select "System Preferences".

In the "System Preferences" window, select "Internet and Wireless", then select "Network".
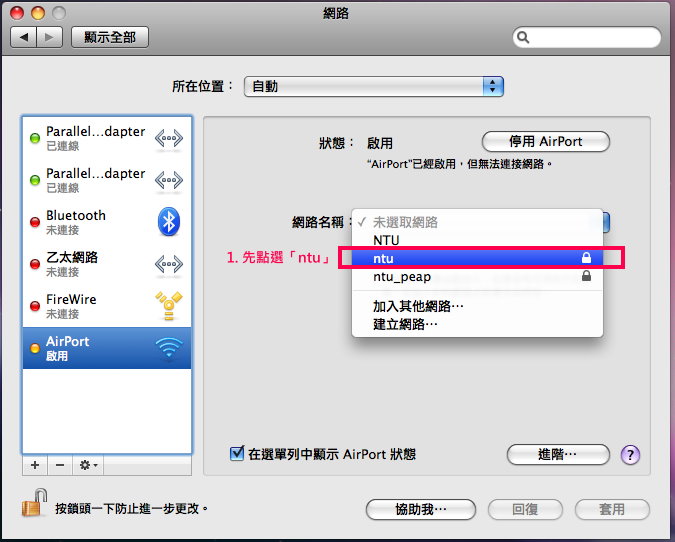
In the "Network" window, select "Airport", then "Enable Airport".
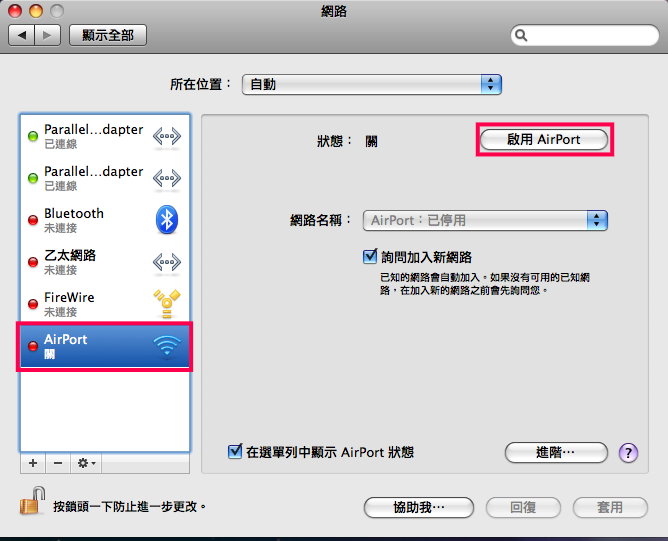
After enabling "Airport", under "Network" select "ntu".
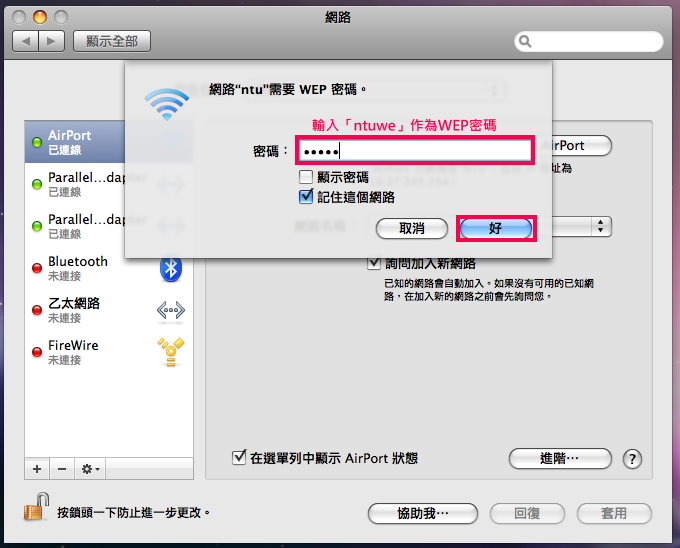
When the "ntu" network asks for a WEP password, enter "ntuwe", then click "Join".
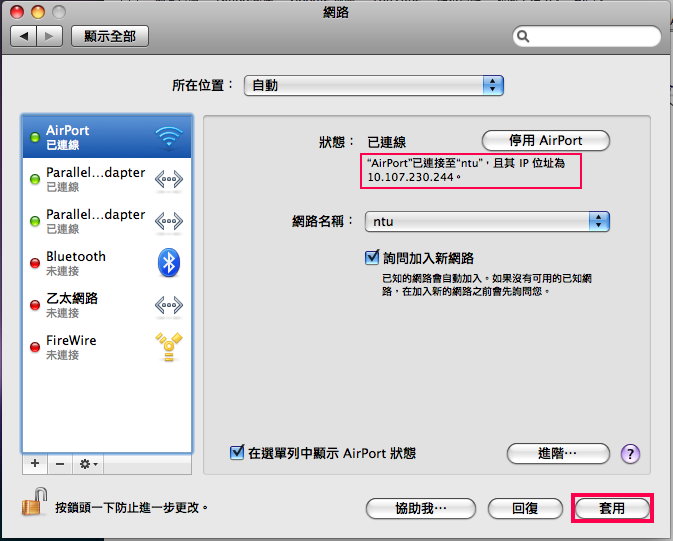
After entering the password, the system will automatically obtain an IP address, the click "Apply".
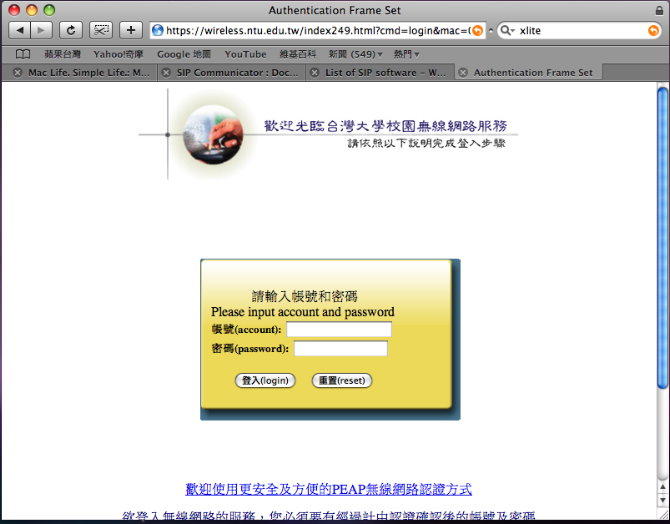
Open an internet browser, which will automatically redirect to the account log in page. Use your e-mail address and password to log in, completing the SSID internet setup.
Linux
Ensure the network card driver has been properly installed.
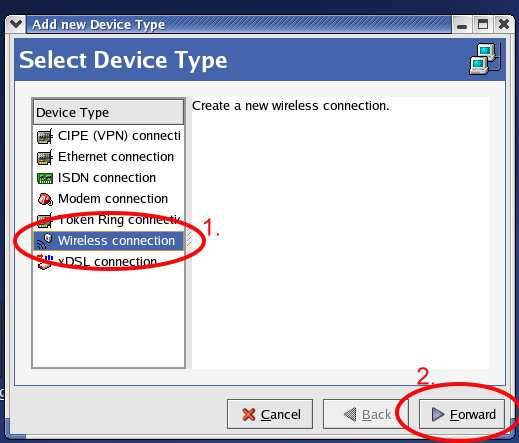
Go to Main Menu > System Tools > Internet Configuration Wizard
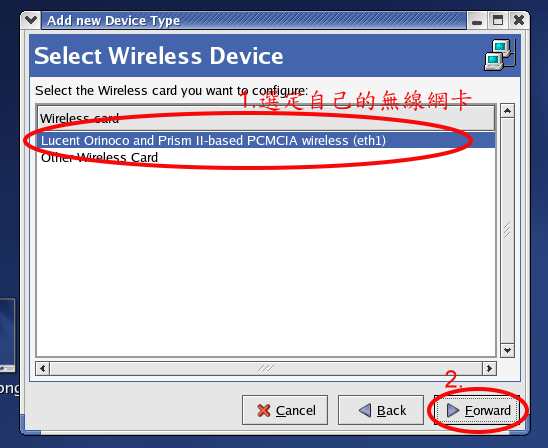
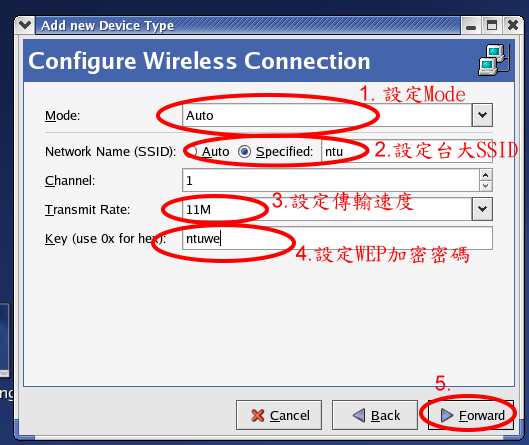
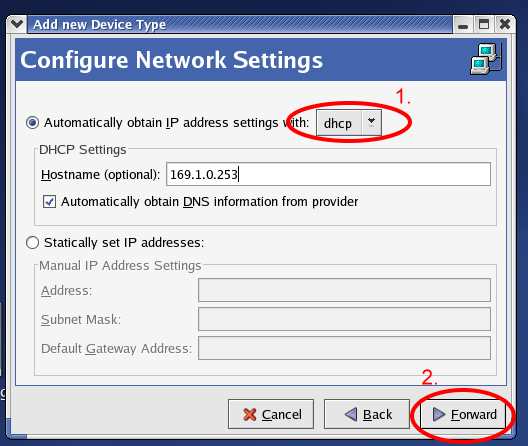
Add a wireless connection.
If a hexidecimal is required, enter "6e 74 75 77 65".
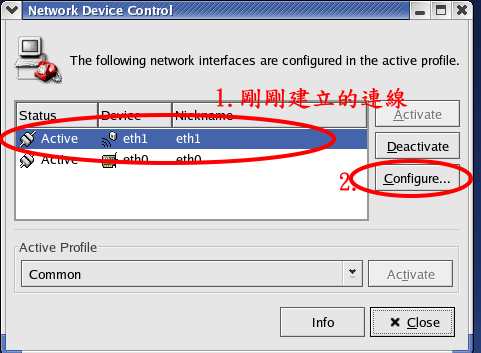
Go to Main Menu > System Tools > Network Device Control
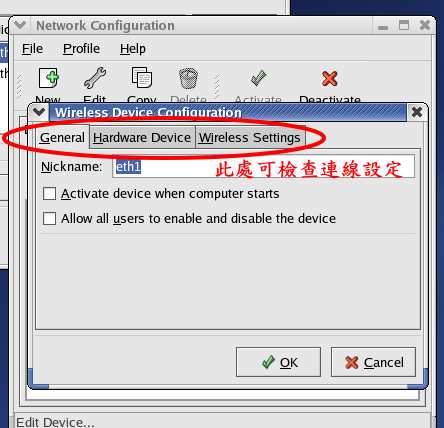
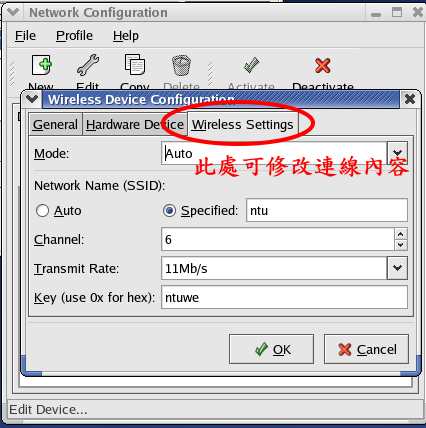
Check that the computer has successfully connected to the network, make sure the settings are correct.
Open Mozilla, and enter the address: 169.1.0.253/images/aclogin.html
Please note: After entering your user name and password, there will be no security certificate error!
After entering the URL address, please enter your username and password. Login is complete.
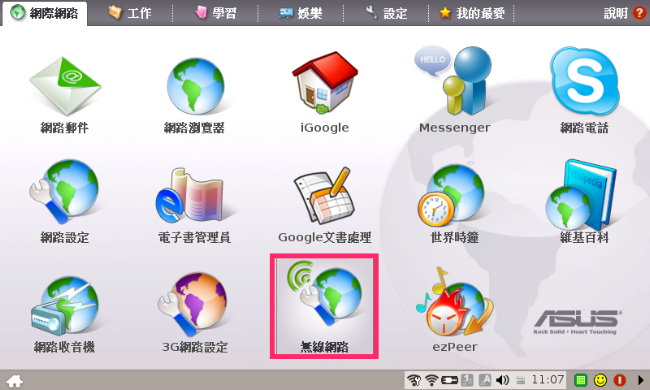
EEE PC
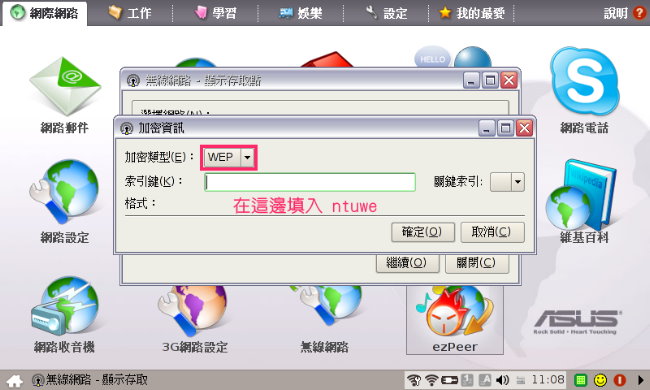
Select "Wireless Internet" in the "Internet" section.
Under "Wireless Internet Access Point", select "ntu", then press "Details".

In the "Encrypted Data" window, under "Encryption Type", select "WEP". Under "Key", enter "ntuwe".

In the "Internet" section, select "Browser".
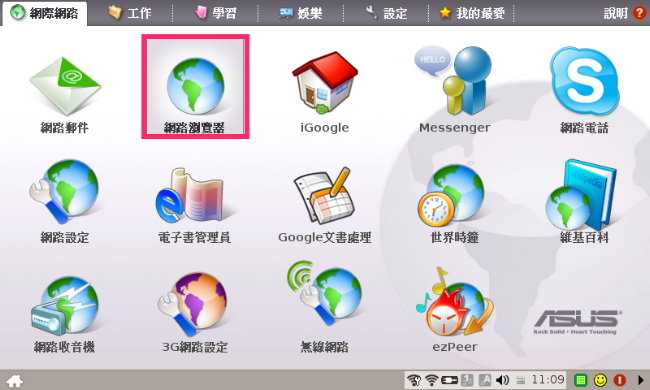

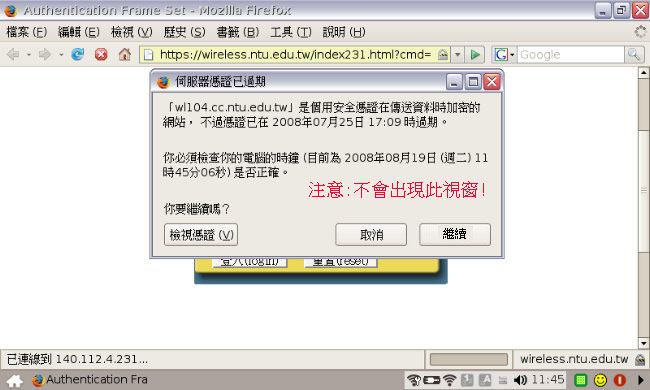
In the user name and password fields, use your e-mail and e-mail password to log in.
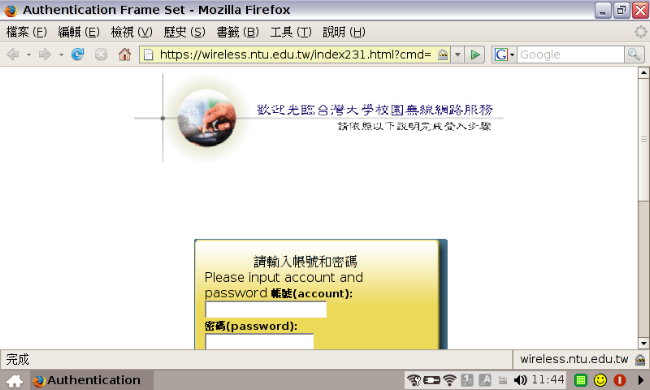
Please note: After entering your user name and password, there will be no "Server certificate has expired" or "Website certificate unverified" warnings!
Android
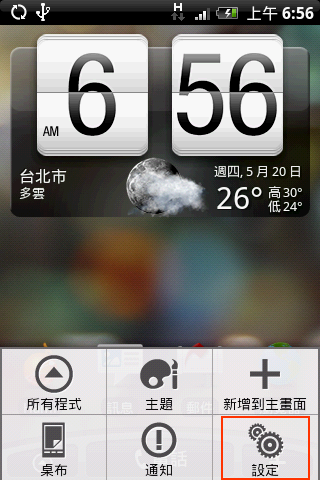
To set up Wi-Fi on an Android phone, on the homepage select "Menu", then select "Settings".
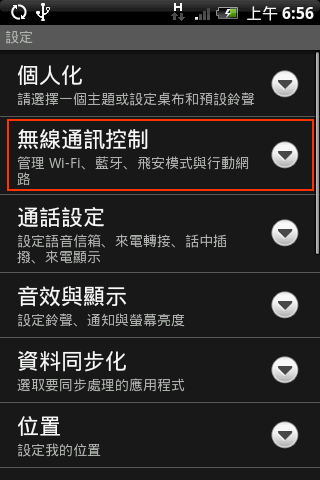
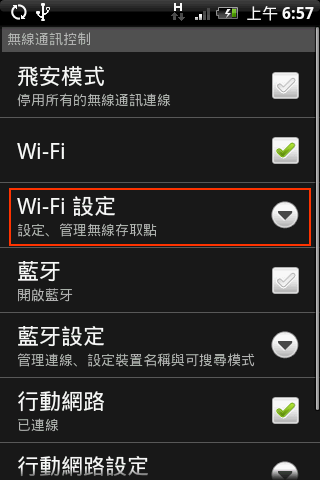
Select "Wireless and Networks".
Tap "Wi-Fi".
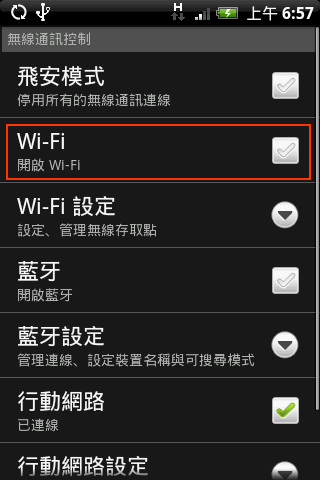
After activating the Wi-Fi (as shown below, with the icon on the right displaying in green), click "Wi-Fi Settings".
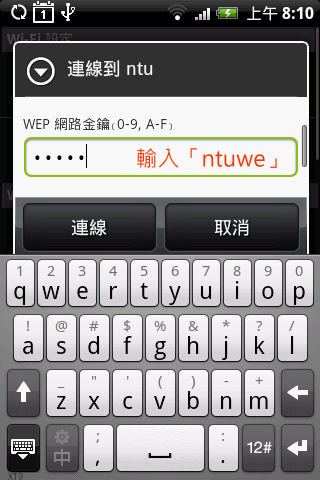
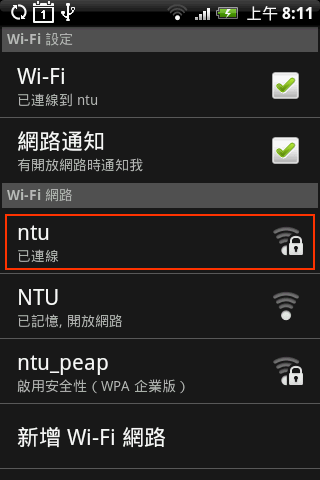
Under "Wi-Fi Networks", select "ntu".

In the "WEP Network Key (0-9, A-F) field, enter "ntuwe".
Wi-Fi setup is complete.
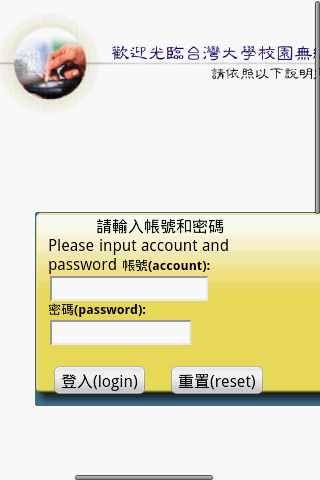
Open a browser, which will automatically redirect to the internet login page. Please use your C&INC e-mail and password to log in.
iOS
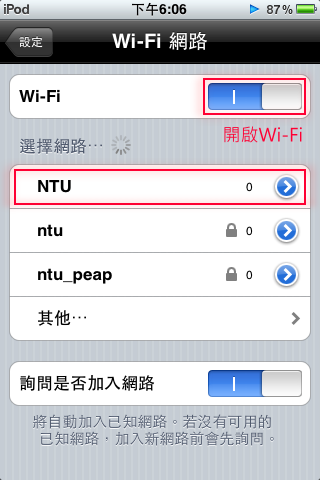
To setup Wi-Fi, first select "Settings" on the home page.

Under "Wi-Fi", switch Wi-Fi to "On", then select the network "ntu".
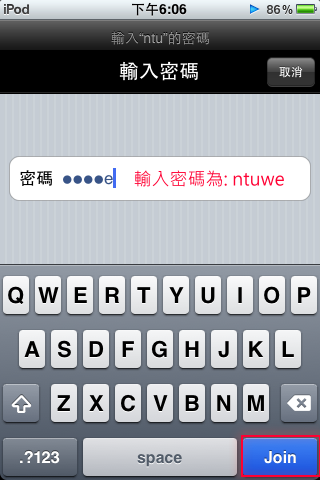
In the "Password" field, enter "ntuwe", then tap "Join".
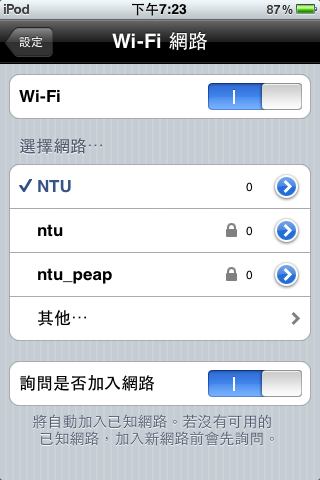
Setup complete.
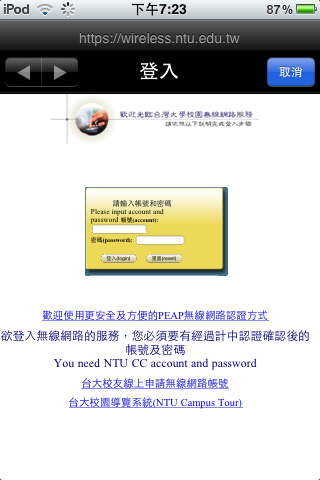
Open an internet browser, which will automatically redirect to the internet account sign-in page.
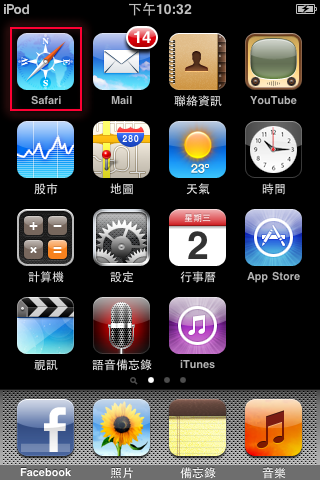
In the user name and password fields, please use your C&INC e-mail address and password.
Copyright (c) 2014 National Taiwan University, C&INC, Division of Network Management
No. 1, Sec. 4, Roosevelt Rd., Taipei City 10617, Taiwan (R.O.C.) Tel: (02)3366-5506~5012 E-mail: net@ntu.edu.tw